Thursday, August 20, 2020

My Tiny Vagabond ~ Joining the Village March 2021!


I told my friends I was "done" with tiny houses.

I promised I wouldn't buy or remodel any more.

But when I saw this 120 sq foot tiny house shell, 
for sale, in Medford on one sunny Summer Day.....

I knew I'd have to break that promise.


The seller wasn't quite sure what to make of me.
I called her, went to the bank, got some cash, and headed her way.
I asked for recommendations which she thought was rude.

It took 4-1/2 hours to get there but over 5 hours to get home.
I drove only 45 mph the whole way home, with my flashers on.

It was the first time I'd towed my own home and it was stressful; 
but worth it!!


The build quality was pretty good, and most of the features were solid.

But My Tiny Vagabond would need a bit of work before I could offer it as a rental option.


The floors aren't great but I love the color and it inspired the rest of the palette.
The entry features an area for hanging clothes and a basket for shoes.


The cabinets needed a bit of tweaking and some graphic design, for sure!
I am so happy with how well the coffee corner turned out.


And this queen-sized bed! 
It's amazing and soooooo comfy.

Flanked with windows and countertops, it's great for sleeping OR lounging.


Where a bench seat once sat, now a workspace and refrigerator add
functionality that was sorely needed.


No propane in this tiny house!
For something a little different, I added an electric cooktop.
It works really well and stows away when not in use.


Guest's luggage stores easily under the bed and there is PLENTY of
under-counter storage area!


Even the garbage can found a perfect, out of the way spot, to hang out.

My Tiny Vagabond also features a cedar loo toilet and shower.

Bathroom PHOTOS COMING SOON!!!!


Thursday, January 16, 2020

My Tiny Wine Wagon ~ From Pancake Shack to Stylish Getaway


Photo by Mark Sharley Photography
Design by Empty Nest Tiny Homes

After a dozen design changes,
5 moves, 
$15,000 spent, 
and countless contractors have come and gone;
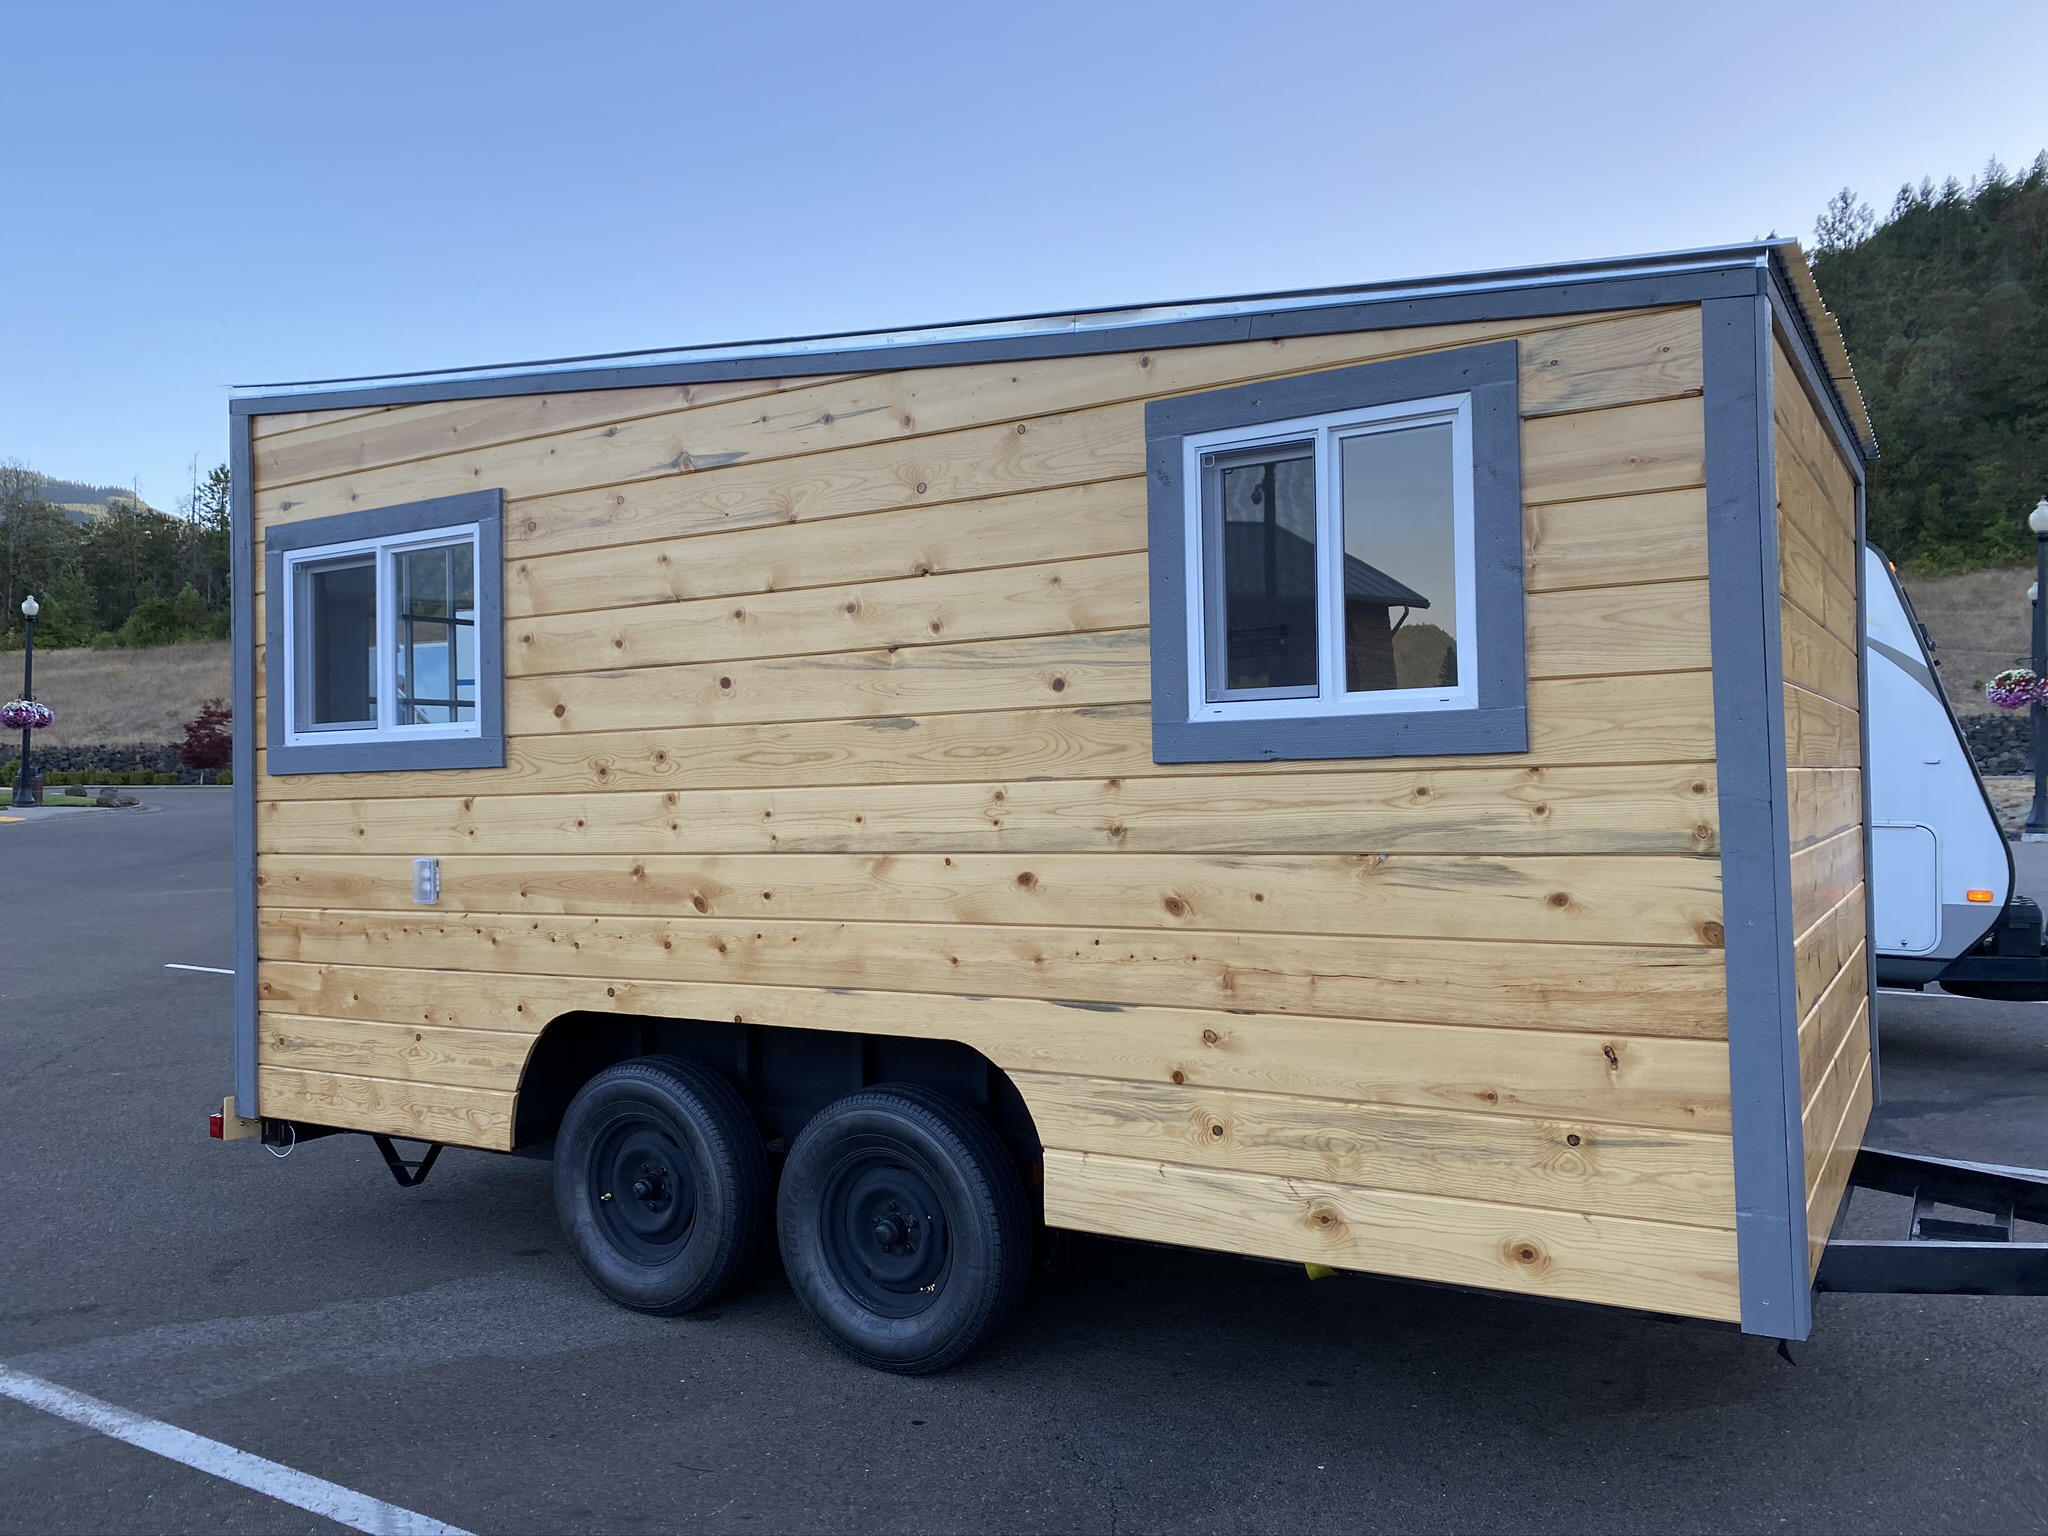
MY TINY WINE WAGON IS DONE!


THIS is what it looked like when I purchased it for a mere $1,000; 15 months ago.
Finding it truly was a serendipitous moment.


Photo by Mark Sharley Photography
Designed by Empty Nest Tiny Homes

And THIS is what it looks like now.
Even in the dark the warm woodsy colors of the deck,
and the porch pergola, and the buffalo check curtains; 
welcome in even the most weary traveler.

Photo by Mark Sharley Photography
Lettering by Jacob Obermiller

Designing tiny spaces is no easy task.
And re-modeling them is even harder!
To say this project had challenges would be a HUGE understatement!

Photo by Mark Sharley Photography
Designed by Empty Nest Tiny Homes

But that's all behind me now.
Hardly a trace is left of the 50's era pancake shack it was.
And even I forget all the difficulties, 
when I walk in and experience the warm and cozy feel of this new and colorful space.

Photo by Mark Sharley Photography
Designed by Empty Nest Tiny Homes

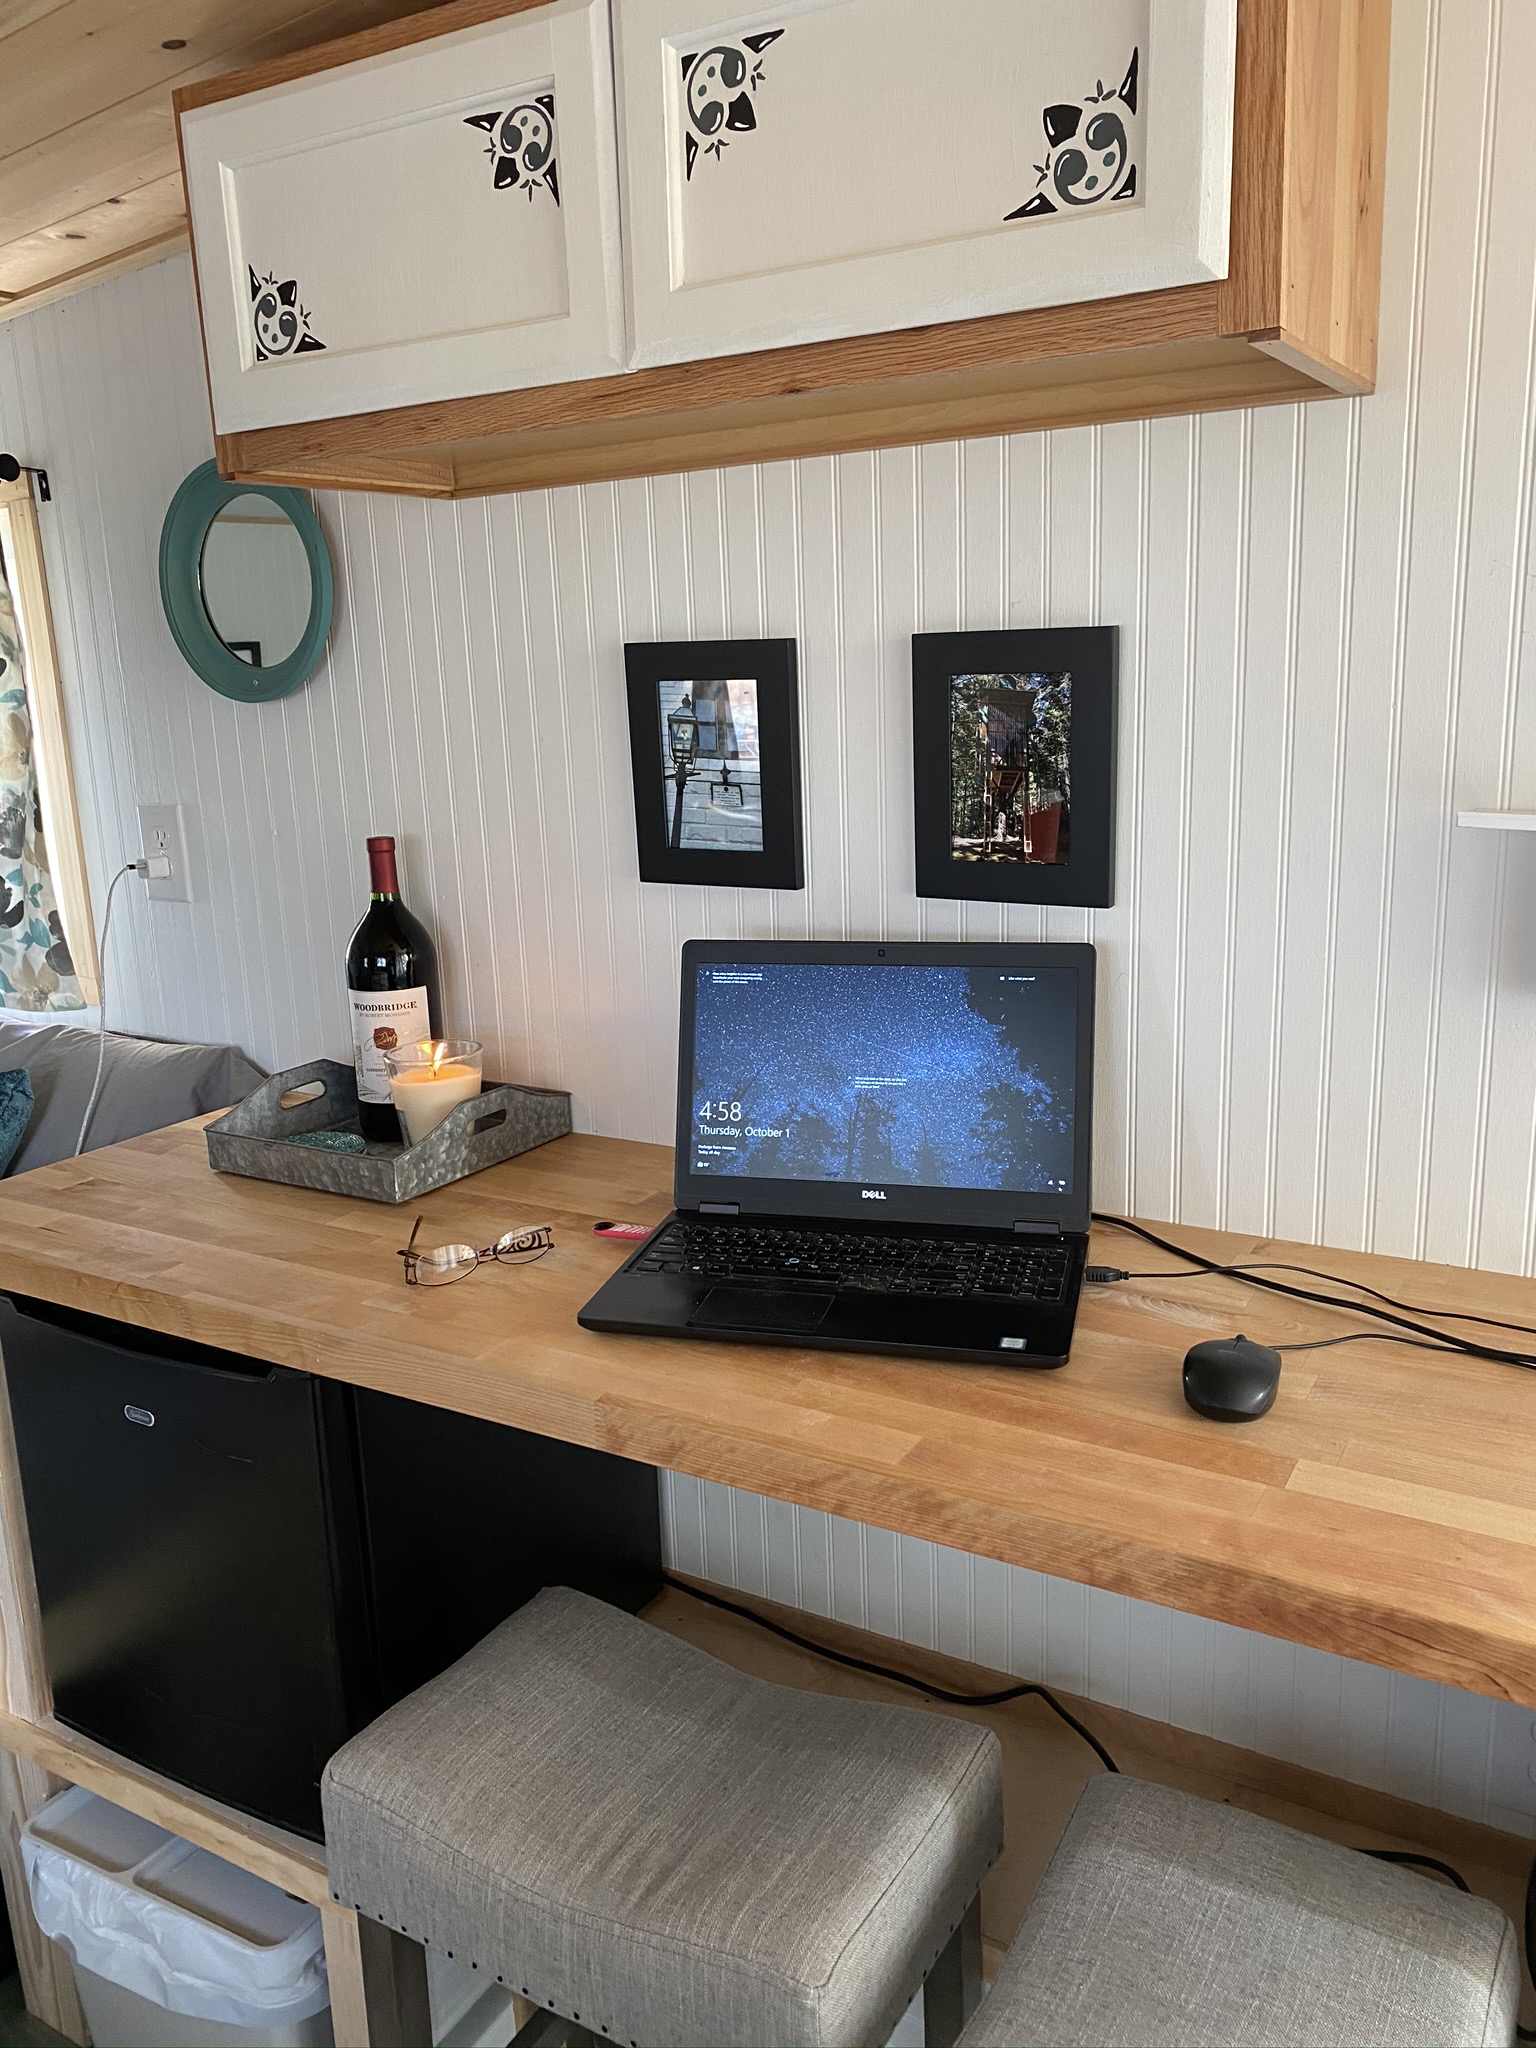
Once inside, you'll find more amenities than you would think could fit into 165 square feet.
This is, by far, my most favorite photo of them all!


And, no joke, THIS is what it looked like BEFORE, from the same vantage point; 
by the now-front-door.

Photo by Mark Sharley Photography
Wall Accent Design by Jacob Obermmiller

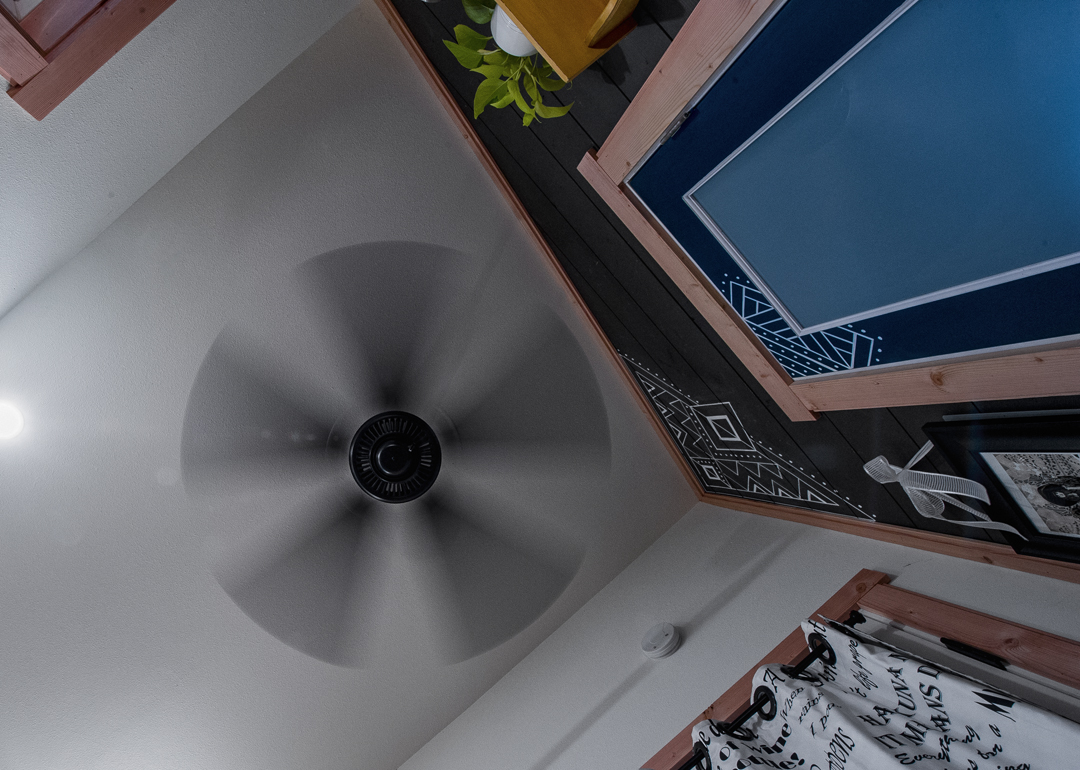
As with all of my tiny houses, it also features a ceiling fan,
which not only looks amazing;
but helps evenly distribute the warmth throughout the space.

Photo by Mark Sharley Photography

But the real star of the show is THIS stunning and dramatic ceiling light.
My Tiny Wine Wagon just wouldn't be complete
without this awe inspiring and oh-so-functional wine glass chandelier.

Photo by Mark Sharley Photography
Designed by Empty Nest Tiny Homes

All the windows and doors are in the exact same spot as they were.
And I think this kitchen sink looks quite perfect under the rear one.
The view of the woods from the kitchen, 
and the happy birds in the morning,
will help our guests forget the frantic pace of the outside world.

Photo by Mark Sharley Photography
Designed by Empty Nest Tiny Homes

What you cannot find in the kitchen, you WILL find in the kitchen cart.
(I confess; this functional rolling cart is in EVERY one of my houses. I think I'm obsessed!)

Photo by Mark Sharley Photography
Designed by Empty Nest Tiny Homes

Love coffee?
Love tea? 
There's no need to choose; My Tiny Wine Wagon has BOTH!


Need a seat?
Have a seat!
These stools store away nicely under the counter.
"To Raise Turn Seat Counter Clockwise"

Photo by Mark Sharley Photography

OK, OK, I admit...
I can't stop staring....

Photo by Mark Sharley Photography
Designed by Empty Nest Tiny Homes

Every space in this tiny home was curated with love.
Pictured here is an authentic 1950's melamine dish set,
locally forged shelf brackets,
a stove top from a fellow tiny house builder,
and under-counter-curtains sewn with love.

Photo by Mark Sharley Photography
Wall Accent Design by Jacob Obermiller
Designed by Empty Nest Tiny Homes

At the opposite end you'll find not one but TWO beds.
These queen and twin bed platforms were built to accommodate even the most picky sleepers.


This is Deana, our Mascot, and my 20 year old Build-A-Bunny.
She was REALLY happy when we dusted her off, 
took her to the mall, 
and outfitted her with a whole new wardrobe!
(including sparkly purple shoes and dance clothes of course...)


There's no such thing as boredom in My Tiny House Village!
Here's a fun, yummy, game and curated library of wine and food themed books.
(including one autographed copy written by the Wine Wagon's FIRST overnight guest!)

To help you embrace your inner child, check out the "fun stuff" basket under the bed.

Photo by Mark Sharley Photography
Wall and Door Accent Design by Jacob Obermiller

One morning my artist friend, Jacob, spontaneously called and offered to "Come over and draw".
Watching him hand paint the accents on the bathroom door and end walls 
was a welcome distraction to my otherwise stressed out day.

Photo by Mark Sharley Photography

Remodeling a tiny space is tough,
but taking this picture of a 18 square foot bathroom is even MORE SO!
(Thank you, Mark.)
This bathroom is SO TINY, even the cedar loo toilet had to be custom-made-to-fit.

Add caption

Inspired by Amelia's bathroom design,
the fold down counter top adds a fun and functional touch
to any morning routine.

Photo by Mark Sharley Photography

Look!
There's even a back door?
Nope.
THAT is the SHOWER door!

Photo by Mark Sharley Photography

If your roommate, however, needs to use the bathroom
while you're enjoying a HOT fresh air shower,
there's also a shower curtain.

Photo by Mark Sharley Photography

This shower head ain't no trickle!
We chose this one for the wide and generous flow of HOT water;
PERFECT for cold mornings.
Photo by Mark Sharley Photography
Designed by Empty Nest Tiny Homes
~~~
Coming or going, I smile every time I see My Tiny Wine Wagon
nestled in the corner of My Tiny House Village.

Soon, you'll find me, wine in hand, enjoying this oh-so-lovely deck!

I am so thankful, so humble, 
And SO HAPPY!!!

~ ~ ~ ~

So.....you wanna' stay here!?
You SO SHOULD!
Here's the booking link!
(and not pictured here are still a few surprises... I'm just sayin'...)

I look forward to hosting you in our tiny corner of Oregon Wine Country!

~ ~ ~ ~

As always, I couldn't have done it without my Sanity Team!

Thank you, my darling Mark, for your ongoing support and patience.
And thank you, Mark Sharley Photography, for your vision and photographic talent!
(Yep. Same guy. I'm so lucky.)
Thank you to my children, Wyatt and Alyssa, for your help and helpful distractions.
Thank you, Melanie, for keeping the Tiny Village clean and tidy while I was ensconced in the build.
Thank you, Jacob Obermiller, for your amazing paint brush and design talent.
And, finally....
Thank you to all of my friends and neighbors for your advice and undying support of my crazy shit.

I'm.
Finally.
Done?
(Anyone wanna' make any bets???  LOL!!)

Michelle "MJ" Boyle
Empty Nest Tiny Homes
Designer, Occupant, Advocate, and Host of My Tiny House Village


Monday, September 23, 2019

WELCOME TO MY TINY HOUSE VILLAGE

Yes, You're on the right internet page....

Since our direct booking website it not yet up and running, this serves as a placeholder page which allows our prospective guests to view and book houses in My Tiny House Village.

After viewing the photos, rates, and our calendar; if you'd prefer to SAVE MONEY and book direct please email me at michelle@mytinyhousevillage.com

So without further ado...


Which one do YOU love the MOST?


My Tiny Perch
148 square feet ~ Sleeps 2 people
Queen Bed on Main Floor w/ bathroom and full kitchen


To see photos and book My Tiny Perch, click HERE


My Tiny Hideout
119 square feet - Sleeps 3 people
Queen Bed and Twin Bed in Dual Lofts
Bathroom and full kitchen on Main Floor


To see photos and book My Tiny Hideout, click HERE


My Tiny Bird House
48 square feet - Sleeps 2 people
Two twin beds, bunk style
Drawer toilet under bed w/ cedar loo outhouse option
outdoor shower, BBQ, and kitchenette on main level


To see photos and book My Tiny Bird House, click HERE


Margot the Teardrop
12 foot long, 1200 lbs
Can be towed by MOST cars and ALL trucks
Sleeps 2 people
Includes camping essentials


To see photos and book Margot the Teardrop, click HERE.


Thursday, June 20, 2019

Six Easy Steps for Installing Rigid Insulation

With each tiny house we build (or re-build) we have the opportunity to try a new type of building material.  Sometimes, changing things up is intentional, and sometimes it is not.

For My Tiny Wine Wagon, due to a major miscommunication regarding the ceiling joists, I ended up with non-vented 2x4's. Certainly this is not ideal but because the roof pitch is 12/2 or steeper, at least it isn't a safety issue.

However, this means I really only have one insulation option that will provide adequate R value while also minimizing (and hopefully eliminating) moisture issues; rigid foam.

In a nutshell, I am using 2" thick (6.5 R value) and 1-1/2" thick (4.5 R value) pieces to fill the 3-1/2" deep spaces between the joists. As such, fiberglass insulation would have been R13 and the rigid insulation is only R11.  But, since we also do not have any venting in the ceiling cavities we'll need an insulation that will fully eliminate air circulation or warm air accumulation.

Lesson Learned:
"Normal" home builders commonly don't understand the challenges of tiny houses. 

Yes, I realize all of this is less than ideal and the builder who did this really screwed up; but alternatively I would have to completely tear apart the roof and rebuild it.  I'll take less-than-ideal over the timeline and monetary impact of fully correcting it.

Next I needed to figure out how to install it.

The process isn't too tough, but worthy of a few quick pics so here goes....

Step One: Measure the space between the ceilings joists.  Do not assume that the space is always the same.


Step 2: Mark the width on the insulation.


Step 3: Using a straight metal edge, mark the cutting line.


Step 4: Cut the foam with a blade or saw.  

For our install, the foam was 8 feet long so we would cut the width first then cut the few inches off the end as needed.

This is a VERY messy process that creates and aerates a LOT of foam particles and at first I was worried about it and researched various blades and methods to reduce the dust.  In the end I decided to use a utility saw and then vacuum up after the mess.


Step 5: Press the pieces between the ceiling joists.  

If you have cut them to the correct width, no adhesive is needed. If you choose to use an adhesive to hold up the pieces that don't fit tight (you can see a bit of sag in the middle here) use a type of construction adhesive with a very fast set up time so you won't be standing there holding it up for long.

I decided not to use adhesive since the ceiling panels will easily hold up the insulation in the few spots where it sage.


Step 6: Admire, vacuum, and get ready for ceiling panel installation!


Monday, May 13, 2019

"My Tiny Hideout" ~ Simple. Hospitality. Perfected.


My Tiny Hideout's build was really tough, took too long, and I ended up spending almost $5,000 over my $20,000 original budget.  

This 119 square feet of tiny house really kicked my butt; 
emotionally, financially, AND creatively.

And as the designer, I pushed myself beyond my comfort zone, 
both architecturally and aesthetically.

But the results have exceeded even my expectations!


Signage Lettering by Jacob Obermiller in Portland Oregon.
Photo by Mark Sharley Photography

Just like My Tiny Empty Nest, the Hideout's welcome wall includes coat hooks and a removable panel which covers the door to the electrical box.


Photo by Mark Sharley Photography

Upon entry, visitors are greeted with the reminder that a sense of adventure helps when considering this climb to the queen bedroom loft.


Photo by Mark Sharley Photography

The kitchen is well equipped with pots and pans, plates and cups, 
linens and paper products;
and has a lovely view of the forest.


Photo by Mark Sharley Photography

My Tiny Hideout is full of dramatic elements, but the ladder to the twin loft isn't one of them.
Under it is the coffee bar / dining table / work space.
(because you can't have enough multi-purpose areas in 119 square feet)


Photo by Mark Sharley Photography

Storage is always a challenge in tiny spaces.
This circa 1900's Model T Ford trunk serves as storage for the iron and ironing board 
as well as backpacks and overnight bags.

Photo by Mark Sharley Photography

Not everyone who stays here will be on vacation, 
some of our guests need a space to work.
And we bet this is the nicest "cubicle" our guests will ever work in.


Photo by Mark Sharley Photography

My Tiny Hideout is full of light and shadows created by a dozen windows.
Yes, a literal DOZEN windows to trim and wash and cover.
So. Much. Work.
But so amazingly beautiful and we couldn't be more proud.


Signage Lettering by Jacob Obermiller in Portland Oregon.
Photo by Mark Sharley Photography

And speaking of light, we love the way it reflects on the galvanized headboard art.


Photo by Mark Sharley Photography

Looking across from the queen loft, you see nothing but forest.
(and your roommate's loft if they're lucky enough to have come along)

Photo by Mark Sharley Photography

So far, one of the most complemented elements is our led light / ceiling fan.
It is remotely controlled, reversible, and the fan has 3 speeds;
low, medium, and blow-your-hair-around high.

Photo by Mark Sharley Photography
Reclaimed Artwork by Derek "Deek" Diedricksen

Because corners shouldn't be boring or under utilized,
at the end of the queen bed you'll find hangers for your clothes 
and these cute little forest monsters to watch over them.


Signage Lettering by Jacob Obermiller in Portland Oregon.
Photo by Mark Sharley Photography

It may be only a twin bed but the new mattresses are soooo comfy!
And the loft "railings" double as bedside tables.

And, if you dare, sit up and slide your legs under the table top, and dangle them below.
You'll have the  best seat in the house and the perfect spot to view the happenings below!

Photo by Mark Sharley Photography
Reclaimed Artwork by Derek "Deek" Diedricksen

Here's a little alcoholic astronaut to keep you company because...why not!?


Photo by Mark Sharley Photography

The view from the twin loft is equally stunning, and dramatic.


Signage Lettering by Jacob Obermiller in Portland Oregon.
Photo by Mark Sharley Photography

Inspired by Amelia's build, the Hideout's bathroom doors are also frosted glass.


Photo by Mark Sharley Photography

It's challenging to make a 24 square foot room appear to be light and bright.
The use of two light fixtures and clear cedar T&G was the answer.
It smells amazing and works well for all three guests.

Photo by Mark Sharley Photography

The shower was a big oopsie when I discovered the fiberglass shower I bought wouldn't fit.
Instead we used a custom fabricated galvanized panel for the surround.
Galvanized metal then became a repeating element and created the masculine feel I was hoping for.


Photo by Mark Sharley Photography

The Nature's Head toilet looks right at home
and the vintage backpack adds whimsy and functionality to this tiny space.

Photo by Mark Sharley Photography

Ready for breakfast?
The kitchen cart pulls out for convenient access to your supplies.


Photo by Mark Sharley Photography

The dual burner propane stove is easy to light, and use.
Finding this uniquely sized one, however, was far from easy.


Photo by Mark Sharley Photography

Inspired by the morning light, Tea peeks out from the shadows...


Photo by Mark Sharley Photography

It took over 2 years to curate the collection of items displayed in My Tiny Hideout.
While shopping, every time I would see something I felt evoked the theme, I would buy it.

This collection includes vintage tools, oil cans, medicine and alcohol bottles, a dark room timer,
lantern, grenade, and galvanized salt and pepper shakers with loose lids.
(too loose to use in the kitchen so they became decor!)


Photo by Mark Sharley Photography

We think the large deck and the forested setting are really important features
used for not only setting the mood
but also for increasing the functionality of the space.

At night, the windows glow and the deck beckons guests outdoors to dine and drink and relax.

~~~~

"I'M DONE!"
After 15 months of building, no two words in the English language are more welcome than these.
Oh wait....maybe there are....I just thought of two more....
"BRING WINE!!!"

~~~

Now accepting reservations for Summer 2019.

~~~

Thanks to everyone who contributed to this STUNNING creation!

THANK YOU...

...to Mark Sharley for framing, siding, trim and the completion of many other projects that are too numerous to count.

...to Mark Sharley Photography for his photographic talent.
(Yep, same guy as the framer)

...to my boyfriend Mark for his patience while I whined, and blundered about, and pushed myself.
(Yep, same guy as the photographer)

...to Jacob Obermiller for his artistic lettering contribution to the headboard art.

...to Derek "Deek" Diedricksen for his funky sense of all things reclaimed and artsy.
(aka: The Reclaimed Art Boards)

...to my numerous and amazing friends and my children for being patient while I was MIA for weeks at a time, either buried in tasks or taking a nap.

And above all, a HUGE THANK YOU to my material sponsors
for their enthusiastic and ongoing support.

I seriously couldn't have done it without you!